How We Create Covers: From Pencil Sketch to Finished Fantasy Art
There is a common misconception that creating book covers with AI is as simple as typing a sentence and clicking Generate. While that can produce interesting images, it rarely creates artwork that truly matches the vision for a novel.
For us, every cover begins the same way it always has—with a pencil and a blank page.
The AI isn't replacing the artist. It's becoming another tool in the artist's toolbox.

Pin this Post

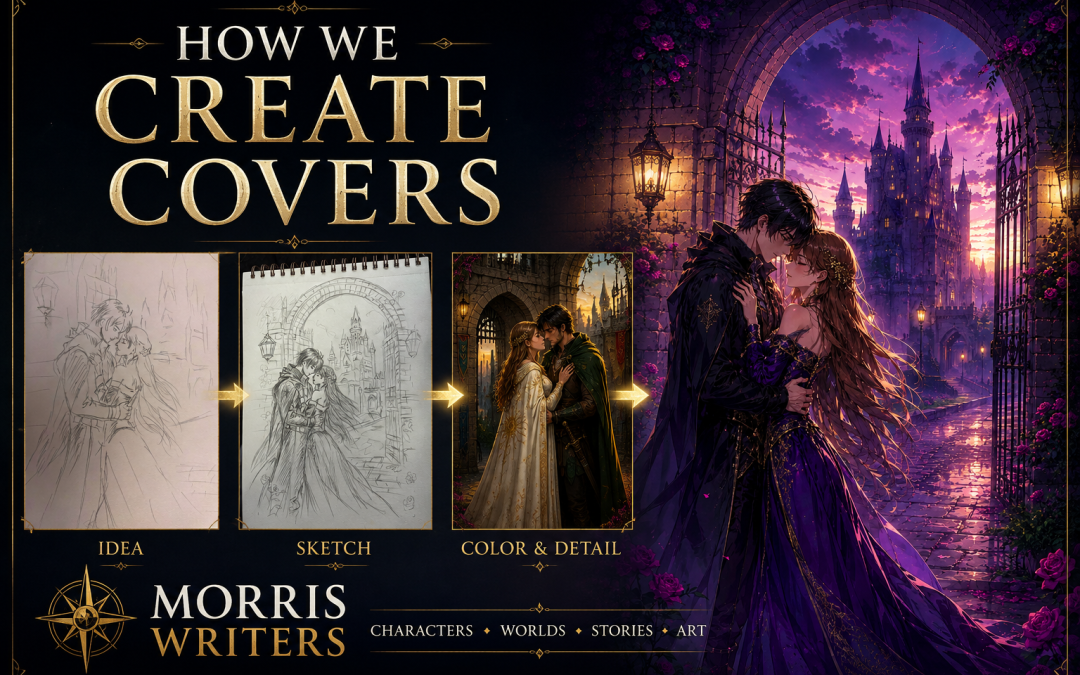
Step 1: The First Sketch
Everything starts with composition.
Before we think about lighting, colors, clothing, or even facial expressions, we ask one simple question:
What is this cover trying to make the reader feel?
Is it romance?
Adventure?
Loss?
Triumph?
That emotional goal determines every line that follows.
The first sketch is intentionally rough. We're looking for:
- Character placement
- Body language
- Camera angle
- Background composition
- Visual flow across the page
Sometimes this first concept comes together in five minutes, but usually longer.
Other times we'll spend several hours sketching, erasing, moving characters, and trying different ideas before anything finally "clicks."
The sketch doesn't need to be beautiful.
It needs to tell the story.
Step 2: Let the Sketch Rest
One of the most valuable tools an artist has isn't a pencil.
It's time.
Once the sketch feels complete, we often put it away for a day—or sometimes several days.
When we return with fresh eyes, problems become obvious.
Maybe the perspective feels off.
Perhaps one arm is too long.
The castle isn't centered.
The pose feels awkward.
The characters aren't connecting emotionally.
These are details that are easy to miss after staring at the same drawing for hours.
This review stage often results in multiple revisions before we're satisfied.


Step 3: Refining the Drawing
Once the composition is working, we tighten everything.
Details begin to emerge.
Clothing becomes more defined.
Architecture gains structure.
Hair starts flowing naturally.
The background is refined enough that the entire scene makes sense.
This stage bridges the gap between an idea and an illustration.
Sometimes we complete this traditionally.
Other times we allow AI to assist by cleaning up proportions or balancing the overall composition while preserving the original design.
The important point is this:
The artist remains the director.
The AI is simply helping execute the vision.
Step 4: Final Line Art
After the composition is finalized, the drawing moves into clean line work.
Traditionally this means inking.
Every confident line replaces the rough construction marks.
The illustration becomes crisp, readable, and ready for color.
Today, this step can happen in several ways:
- Traditional pen and ink
- Digital inking using software like Affinity a free alternative to Photoshop
- AI-assisted cleanup while preserving the original drawing
Whichever method we use, the goal remains the same:
Create clear, intentional line art that communicates every important detail.

Step 5: Bringing the Image to Life
Color completely changes the emotional impact of an illustration.
A warm golden sunset creates romance.
Deep blues suggest mystery.
Crimson skies hint at danger.
This is where the image begins to feel like a real book cover.
There are two primary approaches we use.
Option 1: Digital Painting
Sometimes we color everything manually using Affinity
This provides complete artistic control over:
- Lighting
- Shadows
- Color harmony
- Fabric textures
- Skin tones
- Atmosphere
- Special effects
It's slower but incredibly rewarding.
Option 2: AI-Assisted Coloring
Other times we use the completed line art as the foundation for an AI-generated illustration.
Because the composition, poses, and overall design are already established, the AI has clear guidance instead of guessing.
This allows us to rapidly explore:
- Different lighting
- Multiple costume variations
- Seasonal settings
- Alternate color palettes
- Various artistic styles
If something isn't working, we adjust the prompt—or sometimes the underlying sketch—and try again.

Manual Coloring vs. AI Coloring
Neither approach is universally better. Each has strengths and trade-offs.
| Manual Digital Painting | AI-Assisted Coloring |
|---|---|
| Complete artistic control | Extremely fast iterations |
| Consistent characters | Can explore many styles quickly |
| Every detail is intentional | Excellent for brainstorming |
| Easier to match an existing series | Produces highly polished images rapidly |
| Requires significant time and skill | May require multiple generations to achieve the desired result |
| Slower revisions | Can occasionally misinterpret poses, clothing, or anatomy |
| Excellent for maintaining a unique artistic style | Still benefits greatly from strong underlying sketches |
Why We Still Sketch
If AI can generate beautiful artwork...
Why bother sketching at all?
Because the sketch is where the storytelling happens.
The pose.
The emotion.
The composition.
The visual balance.
The connection between the characters.
Those decisions don't come from the software.
They come from the artist/storyteller.
Whether the final image is digitally painted by hand or enhanced with AI, it begins with the same creative foundation—a thoughtful composition designed to tell a story before the reader has opened the first page.
That's why our process doesn't start with a prompt.
It starts with imagination, a pencil, and a blank sheet of paper.
Every great cover begins with an idea, and every unforgettable image begins with a story worth telling.